Although you can enter your product data line for line in the PlanoGraphics catalog manager this can be very time consuming and not a lot of fun especially if you already have your data ready to go from another source like an ERP system or your product catalog. Wouldn't be great if you could just some how get all the data magically over to PlanoGraphics without all the fuss and bother of entering it in line for line? Well luckily PlanoGraphics has a handy and powerful importer that not only allows you to easily import your data but also helps you easily maintain and sync your data to your data source as your product range expands and changes throughout time. But more on that later. First let's go over how to import your data.
The best way to prepare your data is to use Excel as your data source or as an intermediary data source. Excel allows you to easily and quickly arrange your data's structure to match the required structure from PlanoGraphics. For your data to import correctly arrange it so that it has the following columns from left to right:
The best way to prepare your data is to use Excel as your data source or as an intermediary data source. Excel allows you to easily and quickly arrange your data's structure to match the required structure from PlanoGraphics. For your data to import correctly arrange it so that it has the following columns from left to right:
- Unique product identifier like a part or stock number
- Product description
- Picture file name
- Product Width
- Product Height
- Product Depth
- Cost Price
- Retail Price
- Category
So your data would look something like this:
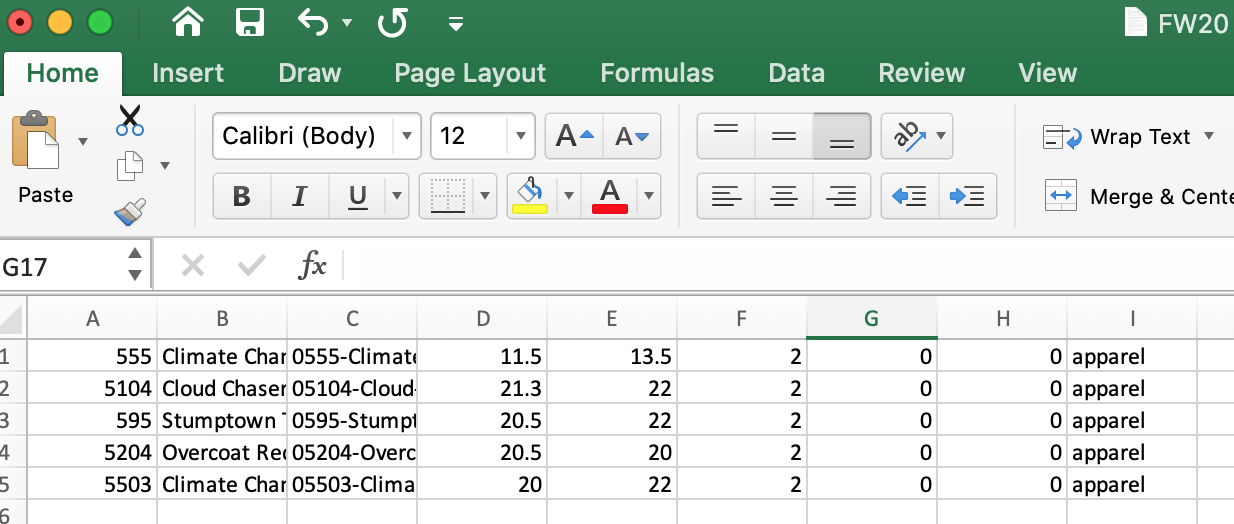
Notice that there no header titles in this file, just your data using the above structure. Don't worry if you don't have all your data like cost price or retail price available, just fill these in with zeros or some dummy content.
After your data is ready you need to export it to a tab delimited text file. For Windows follow these steps:
- Open the File menu and select the Save as... command.
- In the Save as type drop-down box, select the Text (tab delimited) (*.txt) option.
- Select the Save button. If you see warning messages pop up, select the OK or Yes button.
For Mac users the steps are almost the same:
- Open the File menu and select the Save as... command.
- In the Save as type drop-down box, select the MS-DOS Formatted Text (*.txt) option.
- Select the Save button. If you see warning messages pop up, select the OK or Yes button.
Mac users note the text format to use: MS-DOS Formatted Text. Other formats will fail when trying to import into PlanoGraphics.
Now that you have your data exported, head over to the catalog manager in PlanoGraphics:
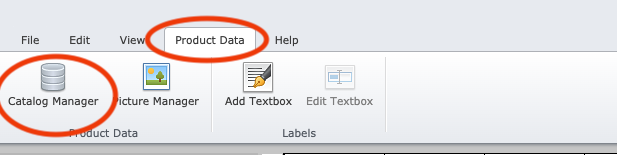
Once you are in the catalog manager select the Importer Product Data tab in the main menu:

In the importer menu click on the Choose File button and select the text file you just exported from Excel. If your data has been prepared correctly you will get an exact preview of how the data will be imported:

If for some reason your text file is not correctly formatted or does not follow the above structure you will get a detailed error message telling you what is wrong with your data and the exact text line the error is on:
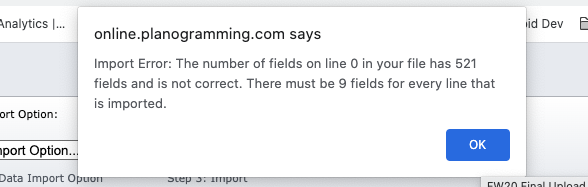
In this example the error was being caused by the text not being exported as a tab delimited text file.
Next select the Import Option. Here are the different options and what they do:
- Append Update: This will look at the data you are importing and update any matching product numbers already existing in the Catalog Manager with the data you are importing. Any product numbers that are not found will be considered "new" product numbers and will be added to the Catalog Manager.
- Append: Any product numbers that are not found in the Catalog Manager will be considered "new" product numbers and will be added to your product catalog. Products that already exist in the Catalog Manager will be ignored.
- Update: Any product numbers being imported that are found in the Catalog Manager will be will be updated with the imported data. All other unknown product numbers will be ignored.
- Delete: This will look at the data you are importing and delete any matching product numbers already existing in the Catalog Manager with the data you are importing. Any product numbers that are not found will be ignored. Be careful using this option as it will delete everything and anything in the Catalog Manager that matches up to the data you are importing and it can not be undone!
After selecting the Import Option click on the Import Data to Product Catalog button to complete the import. After a few seconds you should see a confirmation message that the data was imported and your product catalog will be reloaded in the Catalog Manager with the new changes made by the import.
Now that you have imported your data, the next week's article will be on importing your product pictures.